I can now say I’ve completed my first GOOD corset! Not made of canvas, not boned with flimsy featherlite boning, not drafted by myself, not something that poorly fits my body. Nope, this is a proper historical foundation garment that is made of coutil and spiral steel boning and it’s comfortable and supportive to wear.
Let’s go back to the beginning, just after I finished the final mock-up sometime in…. when was I making that mock-up anyway? *looks it up* Crud, I made that final mock-up in July 2016! It’s taken a little while to finish the corset but that’s okay. You can only do so much sewing as a poor college student. Anyway, first thing I did was get all my supplies. Coutil, spiral steel boning, boning tips, and the busk. I already had the awl and eyelets.

This is my coutil right after I got it. See that chevron-shaped, zigzag pattern in the weave? That’s what makes coutil strong and ideal for corsetry. Something about the physics of that particular weave shape makes it hold up well against lots of tension, and not warp even when under a lot of stress and molded into curvy shapes. My coutil was pretty cheap. It was like $15 for one wide yard, which was all I needed.
There is a price for the cheapness though. My coutil is not very pretty to look at. The weave pattern is pretty coarse and rough, and the color was a rather drab vanilla/pale tan, and there were little specks of darker color here and there. Most of the time, people try to make Edwardian corsets out of one layer of fabric only because that was how they did it back then. (You may remember that my Padmé corset was three layers: silk, canvas and stretchy knit lining.) I would have liked to make a single layer corset for accuracy’s sake, but the pretty coutil runs $25 for HALF a yard! That would have made my coutil cost $50! No thank you! O.O I just ended up using some pretty white linen/cotton material from Hobby Lobby and layering that on top of the coutil. My cheap coutil has held up very nicely anyway. It’s functional, it gets the job done.
Here is a picture of my other corsetry supplies.
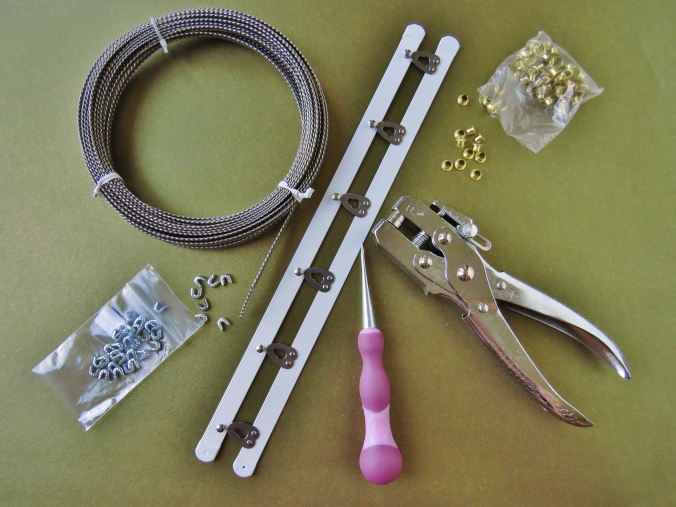
The big ring of metal is 25 yards of spiral steel boning. It was enough, and I just have a little bit left over! Maybe 3 yards at best. The pair of white rods is the busk. The little U-shaped things are the boning tips, the purple tool is the tapered awl, the pliers are my eyelet punch tool, and the eyelets are the little gold things. There are some other tools not shown that I had to use: wire cutters to cut the boning, and two pairs of tweezers to fit the tips onto the boning edges. I also had to order some more boning tips because I miscalculated the amount I would need.
Now that all the supplies are here, the construction begins. I cut out the pieces in both coutil and the thin cotton blend stuff, and stitching everything together was pretty straightforward thanks to my labeling all the pieces as +1-6 on the right side and -1-6 on the left side. I made sure to add 1/8 inch to all the seams because it came out so small in that first mock-up! I think my corset came out a little big as a result (more on that later) but the shape was so good that I never bothered to adjust it much. I did take it in significantly at the hips. The pattern said it has been modified slightly from its original 1913 version in order to better accommodate modern body types. I guess I have closer to an Edwardian body type, because the hips were too big and I wanted the waist tighter and the bust roomier.
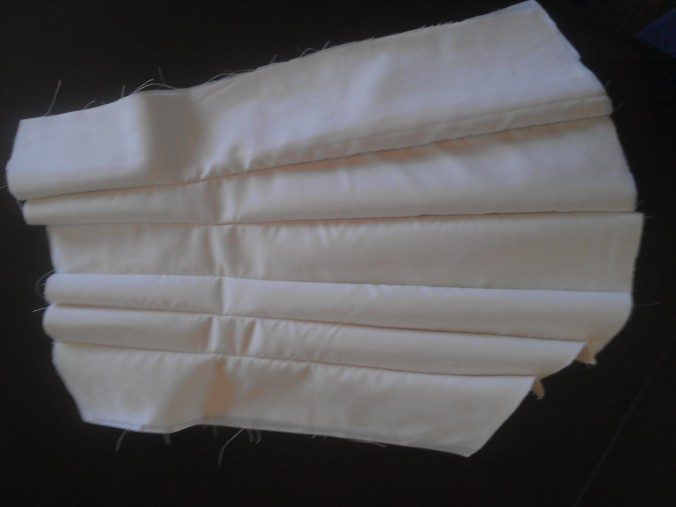
One of the unpressed corset halves. The nice white cotton stuff is facing up.
Next was THE SCARY PART! Insertion of the busk! Beforehand I watched some helpful videos that explained the process well. In particular I recommend Lucy’s Corsetry on YouTube for any sort of tutorials relating to wearing or making corsets. Here’s her video on inserting a busk.
The pattern from Old Petticoat Shop which I used for this corset also explained the process nicely.
In short, you have to turn the front inside out (where the facing is) and lay the loop side of the busk on top and make tracing marks where the metal parts stick out.


And then stitch only on those purple lines. Stick the busk in and turn it right-side out. (And those loops had BETTER fit through the holes!)
And then comes the REALLY SCARY part. With the front facing section right-side-out, you have to topstitch right next to the busk, without hitting it. And you can’t actually see where the busk is. Aaaaaahhhh!
But I didn’t hit the busk. I didn’t break a needle and shoot my eye out. The zipper foot proved to be pretty helpful, and the loop side came out nicely overall!


The knob side is pretty similar. Except you don’t let the knobs come out through the sides. You have to use the awl to drill holes in the top for them to stick out. Sadly I don’t have pictures of that exact step.
I was pretty proud of actually inserting a real busk into a real corset, properly, on the first try! Thank you YouTube!
Next, I had to begin the several-hours-long process of marking holes for all the eyelets and drilling holes with the awl and using the eyelet punch to put the eyelets in. It makes for very sore hands, but a SUPER COOL corset back! 😀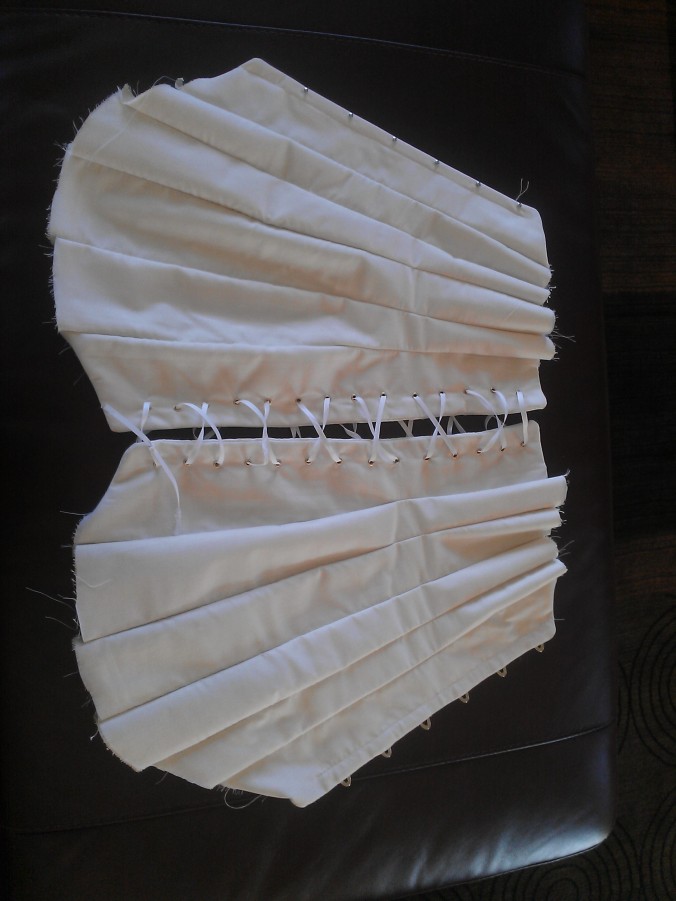
After that was the part that took me months. (I only really could put in a couple of hours per weekend.) I had to press all the seams open, use bias tape to put in boning channels inside and stitch them on the front and sides, cut the bones to their proper lengths, tip them, and put them in. Had to do this for a total of 10 seams and the back, by the eyelets. There’s not a whole lot to describe here, but it was very time-consuming. I started it in November and finished just two days ago. (1/27/2017.)
It looked SO cool by the time I was done though!
It did exactly what I predicted. Followed the curves of my body, smoothed out all the bunches and wrinkles in the corset, and gave it the strength to support the proper silhouette.
In doing all this, I learned a couple of lessons about spiral steel boning.
- It is WAY more comfortable and flexible than plastic, even though that seems counter-intuitive. But plastic boning is very stubborn about staying in this particular curved shape which doesn’t conform very nicely to your body. Spiral steel boning bends four ways and is naturally straight, but can conform to any sort of curve.
- Tipping it is hard work on your hands! Those little things can be surprisingly stubborn to fit around the edge of the bone. But if you pinch them too hard/in the wrong way, they will get crushed beyond repair!
- It feels SO comfortable in a corset. And also it makes you feel like you have rock hard abs when you actually don’t!
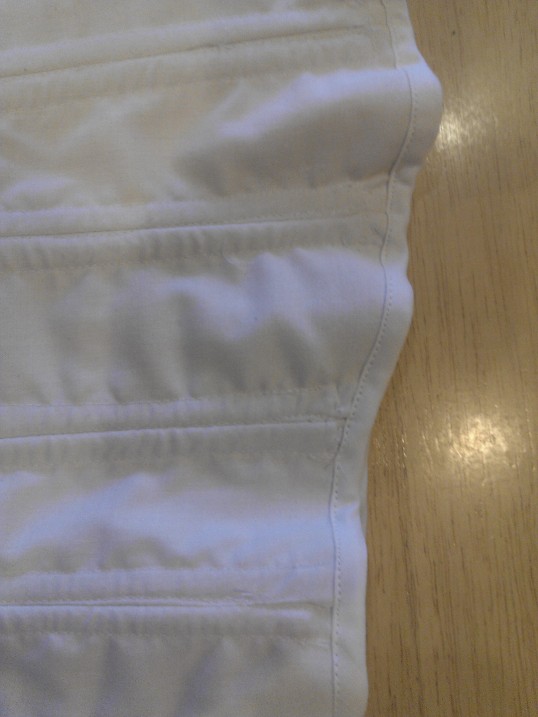
Once all the bones were in, my job yesterday was to finish the raw edges. Following instructions again from Lucy’s Corsetry, I topstitched the raw edges and then trimmed them so they would be easier to work with. You can see the before and after:


Then I made bias tape out of the white cotton blend stuff I used for the outer layer. It made amazing bias tape. After I pressed it and stitched it on, it followed the curves of the corset edges perfectly, without wrinkling anywhere. It was really stretchy.
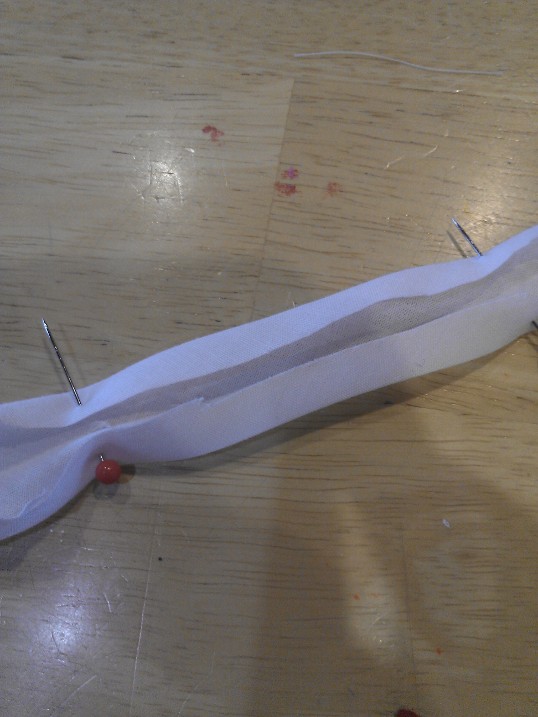
This was how I pressed it.
And below…. look how lovely the edging came out!
After that, the only step was to sew on some pretty lace on the top and tah-dah!!!!

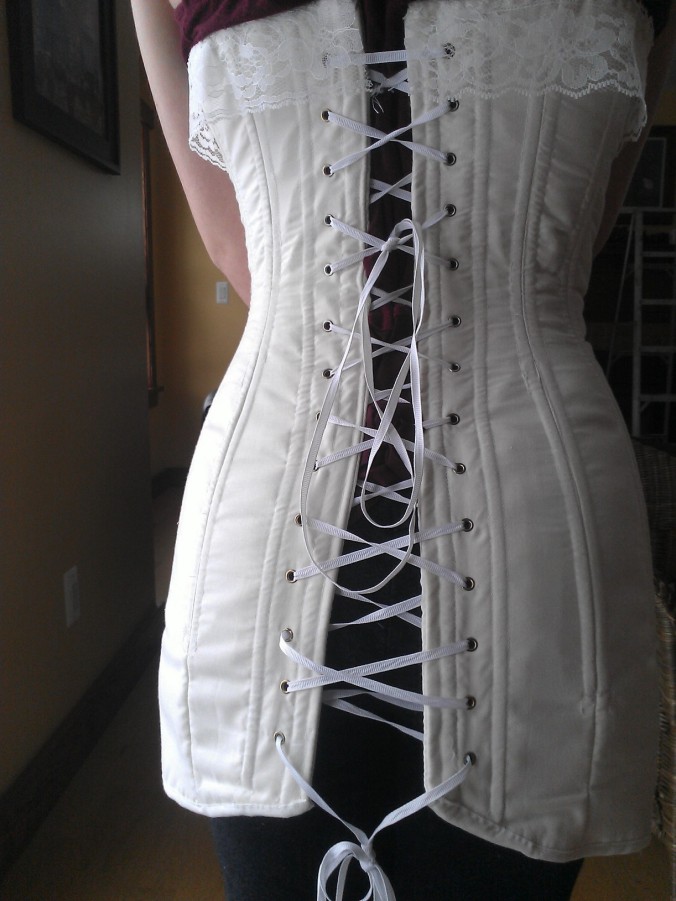
I laced it in kind of a hurry for this picture. When I take more time I get it to distribute more evenly, and I can reduce it more at the waist- and get it to look even curvier than it is more. But you get the idea! You can also see that my lacing gap is a little small; less than two inches at the waist. I wanted to take the corset in a little bit at the waist but I was afraid to tamper with the shape too much.
It reduces my waist by 2 or 3 inches depending on how tightly I lace it, and my bust increases by about 2 inches as a result. I have worn it to school and it feels great!
Increased curves to my boxy figure + back support + Insta-Abs + a historical silhouette = a corset that I am extremely proud of. ❤

Lovely handiwork!
LikeLike
Thank you! 😀
LikeLiked by 1 person